Showing posts with label valentines day. Show all posts

Sunday, February 19, 2012

Guest Post Sunday - Life Unscripted

G U E S T  P O S T  S U N D A Y


Meet Amber from life..unscripted 

Amber has a lovely blog full of DIY's, recipes & everyday life! She's in the process of planning her wedding & just recently had the most adorable engagement photos ever taken!


:::::::::::::::::::::::::::::::::::::::::::::::::::::::::::::::::


hello lovely threadesque readers! my name is amber and i blog over at life...unscripted. over there you will find snip-its of my life, wedding planning, tutorials, and recipes. i love meeting new people so don't be shy! thank you Sam for having me i am so glad to be here today and share a fun, simple tutorial!

it works perfectly for valentines but can be used all year round!
i am loving the chalkboard trend right now and i am jumping on that train.

today i am sharing a cute chalkboard for leaving love notes.

so here we go!
{1}
{2}{3}
i am horrible at waiting for things to dry...
i need to start a new project otherwise i will just keep painting
{4}
you could add rosettes, ribbon, do some decorative painting, or what ever else.
it's kinda like a blank canvas.

hope you enjoyed this simple, fun tutorial!

Pin It

Tuesday, February 14, 2012

Valentines Day 2012!


There's nothing better than love! 

That's why I love Valentine's Day so much! Dono & I celebrated our eighth Valentine's Day together today and it was our first one engaged! It was quite nice starting the day off with a morning cuddle before Dono had class. He surprised me with a beautiful flower arrangement that he... ARRANGED HIMSELF! For lunch I surprised him with spicy BLT's (recipe soon?) & of course, a handmade glittered Valentine! 

We went to The Pearl for dinner, it was by far the best meal I've had in a very long time! We plan on going back very soon! For the final part of our date we went to see, The Vow & may have even teared up a bit.... 

Hope you all had a wonderful day filled with love & chocolate!


xo,
sam

Sunday, February 12, 2012

GUEST POST SUNDAY- Scarlet Begonia VIntage

Meet Jess from 


Jess is the adorable lady behind an amazing vintage shop & lifestyle blog! She has great style and I can't help but to read her blog posts over & over!


:::::::::::::::::::::::::::::::::::::::::::::::::::::::::::::::::


Hello and Happy Valentine's Day Threadesque readers! My name is Jess and my blog is called Scarlet Begonia Vintage. Today I want to show you how to make a lovely Valentine's display out of an old window frame. I love this project because you can get as creative as you want with it (might I suggest this cute idea). 


Step 1- Gather your supplies. You will need the following items for this DIY:
  • Window Frame 
  • Lace
  • Scissors
  • Staple Gun
  • Glue
  • Small Clothes Pins
  • Cotton Swabs
  • Glitter
  • Valentines, Photos, Other Decorative Items to Hang


Step 2-  Position lace where you want it on the frame (you may want to tape it in place, so that it doesn't move during the next step).


Step 3- Flip the window over and securely staple the lace in place on the back of the frame, making sure to keep the lace nice and taught while you are stapling.


Step 4- To glitter, spread glue with cotton swab to the top part of the clothes pin and dip into the glitter. This is best done on a plate to contain your mess. Allow the clothes pins to dry for at least 1 hour before use.


Step 5-  Arrange Valentines, photos, and any other decorations you would like to hang.

-Jess

Tuesday, February 7, 2012

Valentine's Day Playlist

Hi friends! I created a little Valentine's Day playlist for Scarlet Begonia Vintage! 


Listen to a little preview here or head over to 


Monday, February 6, 2012

GIVEAWAY - The Owl Club - CLOSED


G I V E A W A Y


You may remeber Suki from her recent 
Guest Post DIY! 

She's giving away not one item from her adorable shop but TWO items! 


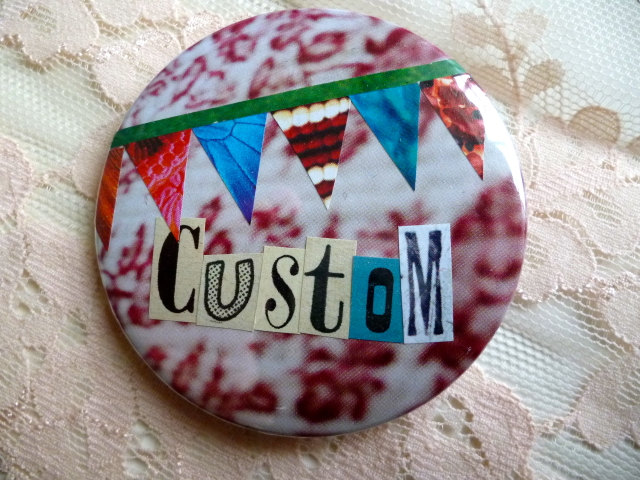
"Your custom pinback badge will be a handmade mini-collage, made using my collection of modern and vintage magazines and ephemera from across the globe and then fixed into a pinback badge. They have been used for wedding photos, baby showers, pregnancy announcements, birthdays, conventions etc. - or just pin it to your lapel or bag!" 


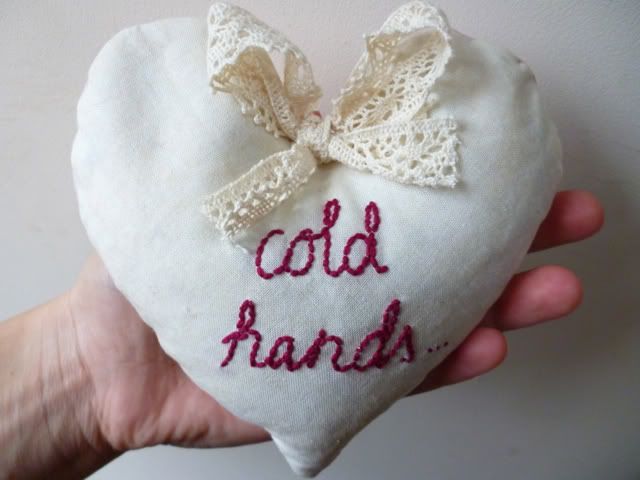
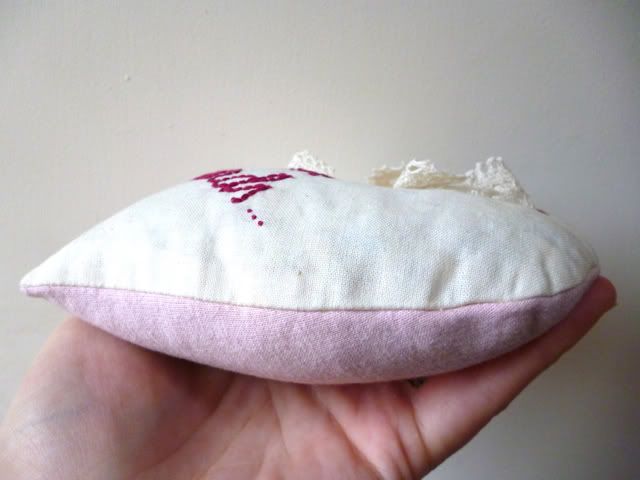
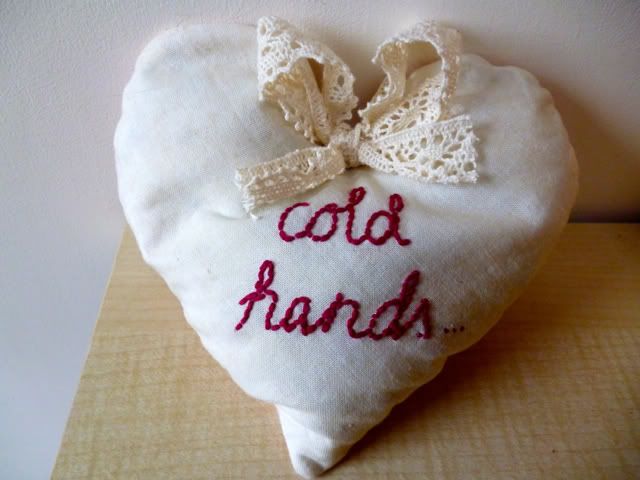
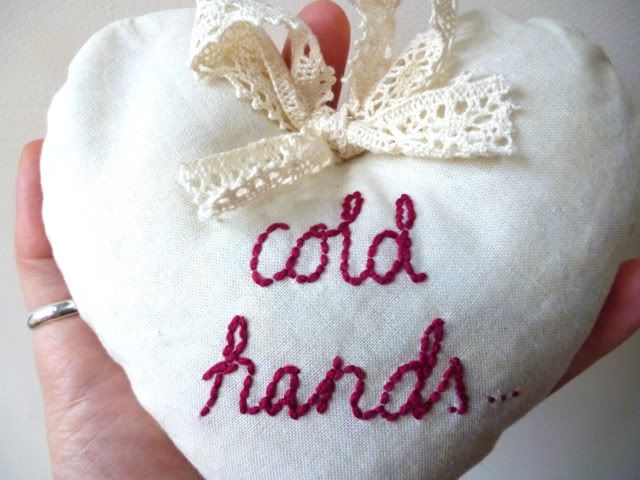
"The heart handwarmer is the very one I made for the DIY post here. It is made from embroidered cotton and soft cotton jersey, and filled with rice and lavender buds. You just pop it into the microwave and hey presto - a cosy, sweet-scented warming heart to keep those cold hands toasty!"


HOW TO ENTER

- Follow Threadesque & The Owl Club

EXTRA ENTRIES

- Favorite The Owl Club's shop on Etsy

- Follow @theowlclub on Twitter 

- Tweet "Win handmade and custom prizes in @theowlclub giveaway on the @samanthabalk blog, threadesque!" with a link to this post. Leave a separate comment on this post letting me know that you tweeted. 


*Please leave your email address in each comment that you leave on this post.* 


*This giveaway will close on Monday, February 13th*

Sunday, February 5, 2012

GUEST POST SUNDAY - The Owl Club


GUEST POST SUNDAY

Meet Suki


The lovely lady behind The Owl Club, 
 BLOG & SHOP


:::::::::::::::::::::::::::::::::::::::::::


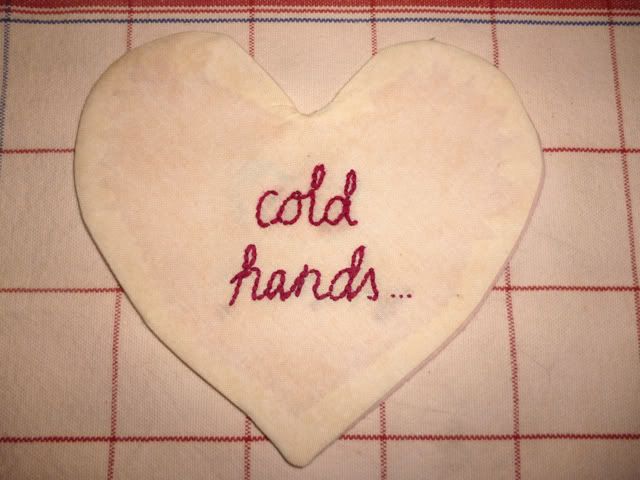
You know that saying, "cold hands, warm heart"? Well this is a sweet, easy project that takes the expression literally and makes a warming, scented heart to heat up those cold mitts. It makes a perfect present for Valentines with hearts aflame but freezing fingers!


The handwarmer is made with pretty embroidered cotton and snuggly jersey. It is filled with dry rice and a sprinkling of lavender. You just pop it in the microwave for 2-3 minutes on medium and it will keep your hands snug for hours, as well as exuding a calming fragrance.


Here's what you need:


  • cotton fabric (you could use an old pillow case)
  • cotton jersey (you could use an old t-shirt)
  • embroidery hoop, thread and needle
  • sewing machine and thread (or you could do it by hand, why not?!)
  • about 275g rice
  • a handful of dried lavender (optional)
  • lace trim or ribbon
  • water soluble pen or tailor's chalk
  • steam iron
  • chopstick


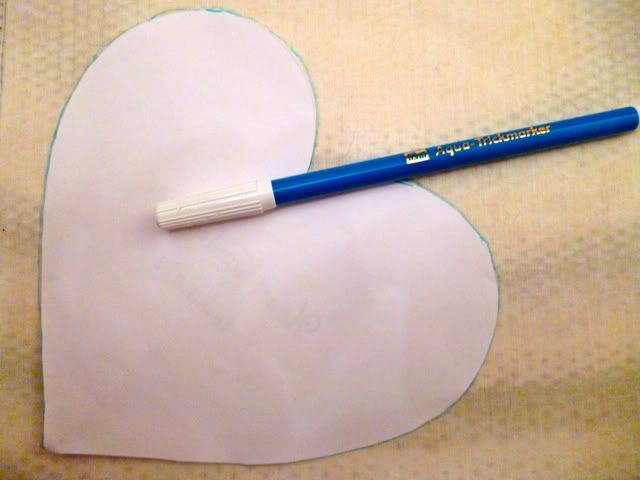
First you'll need to draw round your template (download mine here) on the wrong side of the cotton fabric using chalk or a water-soluble pen. You should be able to see the outline on the right side, to help place your embroidery. (n.b. I used a linen-look cotton here but you could use prints - anything goes!)


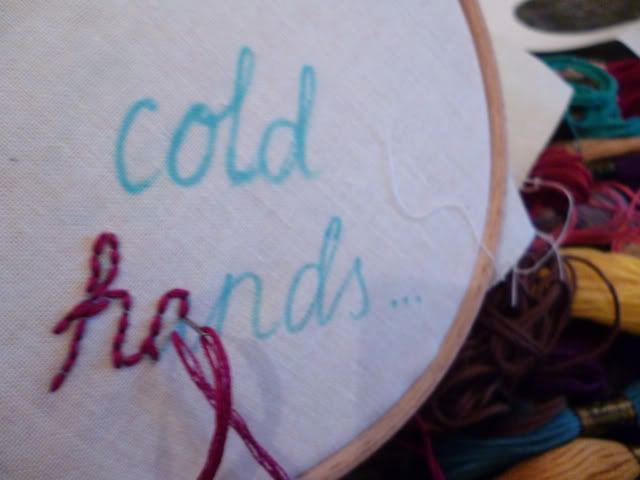
In the centre of your heart shape, draw on your message (it could also just be "I love you"!) Stretch the fabric in an embroidery hoop and use a small back stitch (or any fancy stitch you like!) to create the lettering. I wanted a handwritten look with plenty of texture, so I used all 6 strands of my embroidery floss.


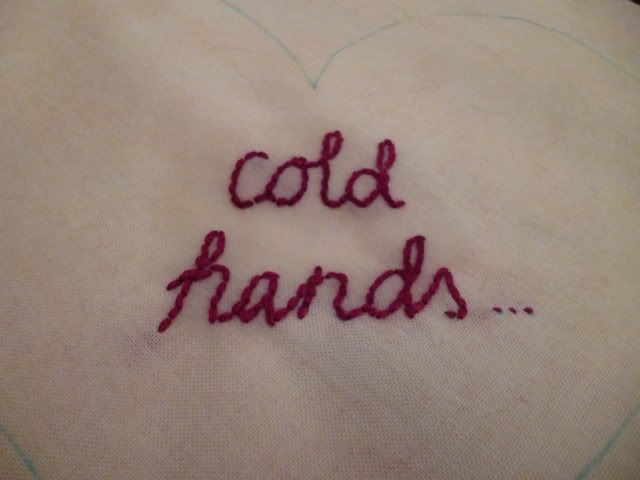
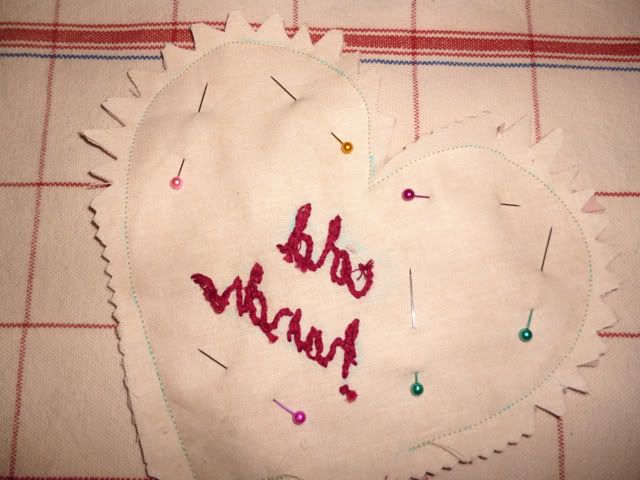
So then you'll have something like this! Make sure you wash off any traces of the original pen lettering at this stage.


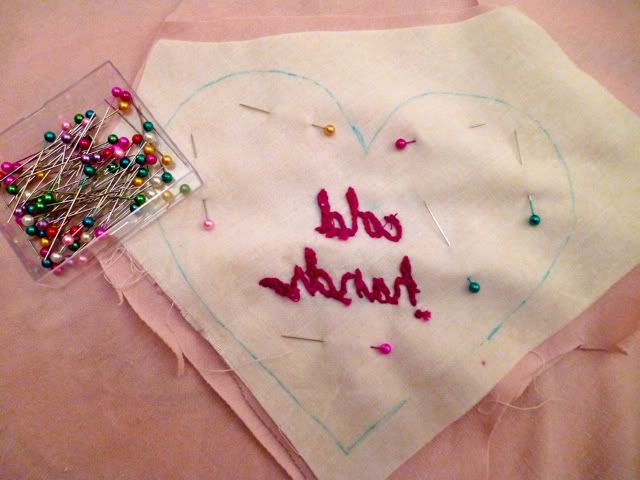
Cut roughly round the heart shape and pin to 2 layers of cotton jersey before cutting out, leaving plenty of margin at the edges (because jersey can shift around a bit). Make sure the middle piece of jersey has its right side facing the right side of the cotton before you sew!


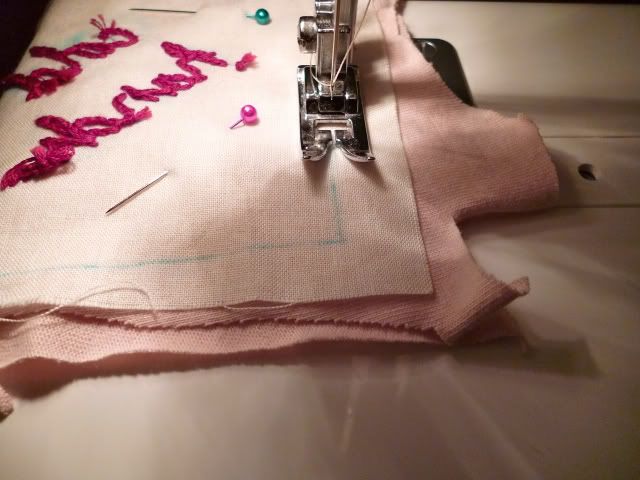
Then sew around the heart shape, using a small stitch width to go smoothly round the curves. Make sure your needle is down in the fabric when you turn the foot to go round the points. Also make sure you leave a small gap (about 2.5cm/1.5inch) for turning out. The picture above indicates a good place to start sewing so that you have a gap along the straight edge (easier for sewing up afterwards).


Trim off the edges neatly and notch around the curves so that it will turn out with as smooth a curve as possible. Hey, you're nearly there!


Then turn it out, using a chopstick to get into the points (and the flat end of the chopstick is great for going round the curves!) Give it a good press with a steam iron to neaten it all up.


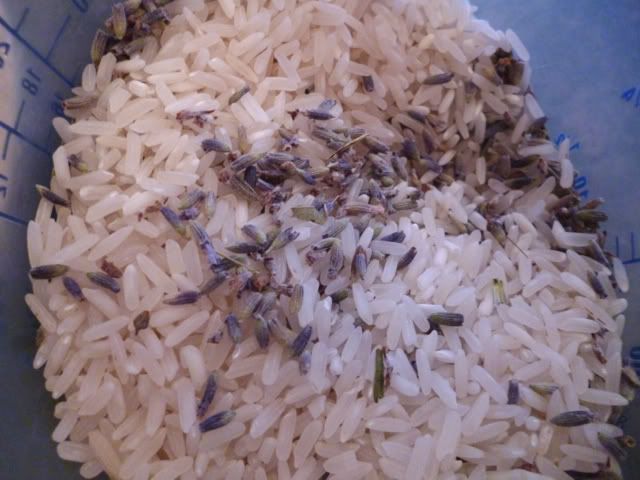
Put the rice in a container and mix through a handful of dried lavender buds. Mmm, smells good, bet you're feeling all calm now? Good, because this is the fiddly bit: using a spoon and funnel, or just a teaspoon, fill the heart until it is fairly full but still squidgy to the touch. Tip: place a bowl under the the heart as you fill it to catch any stray grains of rice!


Then sew up the opening using an invisible ladder stitch. To prettify, sew on a bow made with lace trim or ribbon... and you're done! You could also make a little label with instructions on how to heat the handwarmer. I like a brown paper tag with a little matching lace and a button glued on.


And there you have it: a pretty heart-shaped handwarmer, for your Valentine, or just for someone suffering from the cold February weather! Have fun making them!


Suki xo


p.s. you can see where I found my inspiration for this project here.

Sunday, January 29, 2012

DIY Map Valentine


I love making my fiance, Donovan sweet handmade cards all the time but for Valentine's Day I always do something extra special! We love to travel together so I decided to make him a map valentine that could also be used as art around our house! 


You will need..

-A map
-Glitter
-Pencil
-Scissors 
-Glitter glue


Step 1: Draw a heart shape on the back of your map 

Step 2: Cut along the line

Step 3: Write the letters on the map using your glitter glue

Step 4: Glitter! Shake off excess glitter


Step 5: Give to your loved one on Valentine's Day!


Related Posts Plugin for WordPress, Blogger...